Protekt Next.js SDK
The Protekt Next.js client library simplifies integrating Protekt in your Next.js app by wrapping Protekt's APIs into easy-to-use methods and functions. This guide will walk you through the steps to implement authentication in your Next.js application using Protekt. It's intended for developers who have a basic knowledge of React and Next.js App Router.
Prerequisites
Before you continue, ensure you complete the following requirements:
- Node.js v21+ is installed on your system.
- You have signed up for a Protekt account.
- You have a Next.js v15+ project already set up.
Install Protekt Next.js SDK
Navigate to your Next.js project root directory and run the following command to install Protekt's Next.js SDK:
npm install @hackmamba/protekt-js
Step 1: Create a new Protekt project
To create a new Protekt project, log in to your dashboard and navigate to the Projects page. Click on Create new Project on the top menu bar and follow the instructions in the modal.
When prompted for the authentication method, select Password-based login. Once the project has been created, click on it and copy the Protekt Login ID string that appears in the Configuration tab.
Now go back to your Next.js project and add the Protekt Login ID in .env as an environment variable:
PROTEKT_Login_ID = '<your_Protekt_Login_ID>'
Step 2: Configure your Universal Login and Logout components
In src/app/auth/login.tsx, import the prebuilt Login and Logout components from the SDK and provide them with your PROTEKT_LOGIN_ID.
"use client";

import { Login } from "@hackmamba/protekt-js/universal";

const config = {
  protektID: process.env.NEXT_PUBLIC_PROTEKT_LOGIN_ID,
  redirectUri: "/dashboard",

};

export function Login() {
  return (
    <div>
      <Login
          config={config}
        />
    </div>
  );
}
This is what the login page looks like:
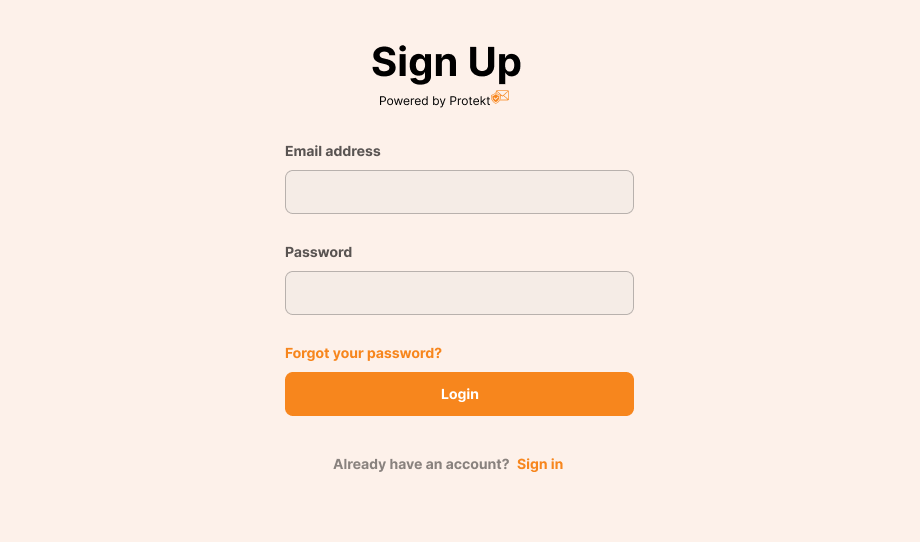
Notice that we’re using NEXT_PUBLIC_PROTEKT_LOGIN_ID since environment variables accessed in the client must be prefixed with NEXT_PUBLIC.
Step 3: Protect a route in Next.js
The core idea behind authentication in a Next.js app is to restrict user access to sensitive data and information. You can protect pages or API routes by checking the user’s session from Protekt, using the getSession() helper method.
The following example adds authentication to protect a dashboard page created in src/app/dashboard/page.tsx. If the user is not logged in, they are redirected to the login page we defined earlier to log in:
import { getSession } from "@hackmamba/protekt-js/server";
import { redirect } from "next/navigation";
import { Logout } from "@hackmamba/protekt-js/universal";

export default async function Dashboard() {
  const session = await getSession();

  if (!session) {
    redirect("/login");
  }

  return (
    <div>
      <h1>Welcome, {session.user.email}!</h1>
      <p>This is your secure dashboard.</p>
      <Logout
          config={{
            ProtektID: process.env.NEXT_PUBLIC_PROTEKT_LOGIN_ID,
            redirectUri: "/login"
          }}
          />
    </div>
  );
}
In the above code, the secure JWT token issued by Protekt is stored as a secure HTTP-only cookie in your browser and then used in subsequent requests. The getSession() method reads the cookie, validates the token, and returns a sessions object containing the user's data.
So basically, instead of handling raw cookies yourself in your code, getSession() abstracts all of this away, allowing you to focus on other important areas of your application.
Next steps
- Protekt Dasboard: Learn how to customize and manage your Protekt projects
- Protekt Next.js SDK API reference: Explore the functions and methods in the Protekt Next.js SDK more fully.
- Troubleshooting: If you run into problems, see our troubleshooting guide for common errors and how to fix them.